The Treat I Lost for Years — and Finally Found Again
I first stumbled across these little gems in the late ’80s, tucked inside a cozy, no-frills bakery along the Oregon coast. You know the kind of place—fogged-up windows, the smell of butter and sugar drifting out onto the sidewalk, locals chatting with the baker like old friends.
I didn’t even know what they were when I bought one. They sat quietly in the display case, unassuming little rounds dusted lightly with sugar. One bite, though, and I was done for. Dense, rich, deeply chocolatey, with a texture somewhere between fudge and cake—but better than both.
Then life happened. I moved away. Years passed. Every time I went back to the coast, I looked for them. Sometimes the bakery was closed. Sometimes they’d stopped making them. Once, heartbreakingly, they were sold out.
The one time I managed to catch them in stock again, I did not act like a reasonable adult. I bought every single one they had, packed them carefully into my freezer when I got home, and rationed them like treasure. (No regrets.)
Fast-forward to now: after years of experimenting, tasting, and tweaking, I can finally make them myself. And let me tell you—I am living in absolute dessert heaven.
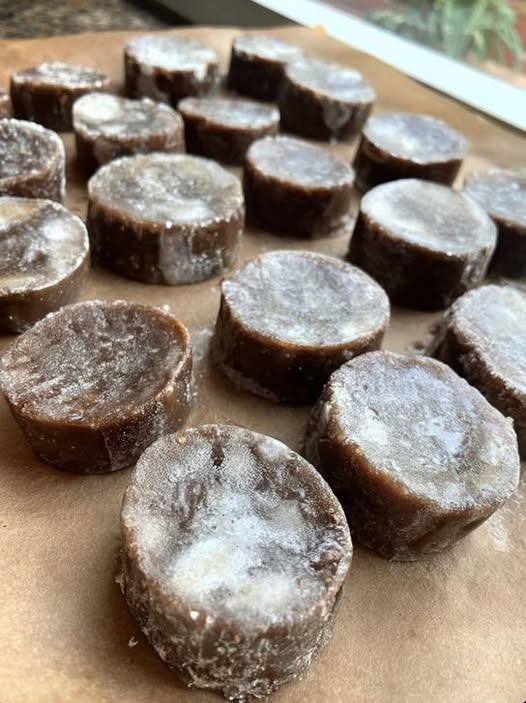
These are rich, old-school chocolate freezer treats. Simple ingredients. No frosting. No fuss. Just pure, nostalgic comfort.
Old-Fashioned Chocolate Freezer Fudge Cakes
Why You’ll Love Them
- Deep, intense chocolate flavor
- Dense and fudgy with a slightly cakey bite
- Perfect for freezing and eating straight from the freezer
- Taste even better the next day (and the day after that)
Ingredients
- 1 cup unsalted butter
- 1½ cups granulated sugar
- ½ cup unsweetened cocoa powder
- ½ cup whole milk (or evaporated milk for extra richness)
- 1 teaspoon vanilla extract
- ¼ teaspoon salt
- 2 cups crushed vanilla wafers or graham crackers
- Optional: powdered sugar for dusting
Instructions
- Prepare Your Pan
Line an 8×8-inch pan with parchment paper, leaving some overhang for easy removal. Set aside. - Make the Chocolate Base
In a medium saucepan over low heat, melt the butter. Stir in the sugar, cocoa powder, milk, salt, and vanilla. Cook gently, stirring constantly, until everything is fully melted and smooth. Do not boil—just warm and cohesive. - Add the Crumbs
Remove the saucepan from heat. Stir in the crushed vanilla wafers or graham crackers until fully combined. The mixture will be thick and glossy. - Set the Mixture
Press the mixture firmly and evenly into the prepared pan. Smooth the top with a spatula. - Chill Until Firm
Refrigerate for at least 2 hours, or until completely set. For the authentic experience, transfer to the freezer once firm. - Slice and Finish
Once solid, lift from the pan and slice into small rounds or squares. Lightly dust with powdered sugar if desired.
How to Store (And Why Freezing Is Magic)
These keep beautifully in the freezer for weeks—maybe longer, though I’ve never tested that theory successfully. The cold deepens the chocolate flavor and gives them that signature dense, satisfying bite.
I like to let one sit at room temperature for about 5 minutes before eating… or not. Straight from the freezer is fantastic too.
Final Thoughts
There’s something incredibly comforting about reclaiming a flavor from your past. These little chocolate rounds carry the memory of misty coastal mornings, paper bakery bags, and the simple joy of discovering something unexpectedly perfect.
The best part? I never have to hunt for them again.
If you’re a fan of nostalgic, no-frills desserts that taste like they came straight from a small-town bakery case, these are absolutely worth making—and hoarding.
Trust me. I’ve been waiting decades for this recipe. 🍫✨